Table of Contents
Demo & Tutorials
SW upgrade procedure
The firmware upgrade can be performed very easily using the MSD mass storage device bootloader technology that allow you to “copy paste” the new binary executable file in the smartPID controller connected via USB and mapped as a USB memory drive
To upgrade FW you DON’T need any driver or SW installation, just simply follow below steps
FW upgrade does not cause the lost of configuration data but in any case write down your relevant parameters (PID Kx tuning parameters, process parameters etc..)
Programming an application via the bootloader
- download the last FW version, unzip the file and extract the executable .bin file
- connect the front USB socket to a USB data cable (make sure is a data cable and not only a recharge cable)
- connect the USB cable to a PC (windows/lunux/mac) while keeping the S/S button pressed
- SmartPID will appear as a mass storage device and the OLED display will alternate between a black and a white screen
- remove the FLASH.BIN file present in the mass storage device
- copy the your executable .bin file of your application to the mass storage device
- safely remove the USB mass storage device from the PC
- power the controller normally the and reboot
- SW version is reported in the INFO menu inside the top menu
here a short video of the the upgrade procedure
ENGLISH VERSION
ITALIAN VERSION
Klarstein and other single vessel BIAB mash tun retrofit
SmartPID CUBE controller is suitable tro upgrade single vessel BIAB mash tun like Klarstein, Ace Microbrewery, EasyGrain, HopCat, Easybrew and may other branded
The smartPID controller can provide a full set of benefits and new feature like
- Full brewing process automation from: step mash, boil,hop addition, whirlpool, cooling
- PID-PWM precise temperature control
- PUMP control
- Auto and manual mode
- Recipe Management
- Delay start
- WiFi connection and remote data monitor
- Android dedicate smartphone app
- OLED graphic display
- USB port for PC connection
- SW upgradable
The upgrade procedure is almost plug and play and requires to disassemble the original controller and insert SmartPID CUBE, AC/DC power supply and a SSR relay
Below the wiring schema
A complete kit with all components is provided with
- SmartPID CUBE controller with pre-loade last version of smart hombrewing application
- NTC 10K 1% temperature probe M6 replacement
- SSR (solid state relay) 40A with heatsink
- Stainless steel laser cut front panel
- Stainless steel mounting brakets
- 110/220V AC - 12V DC power supply
- Wire connectors
- 3M professional be-adhesive tape
The step by step guide allow you to easily upgrade your system
klarstein_retrofit_with_smartpid_cube_step-by-step_guide.pdf
Guida all'aggiornamento passo passo (ITA)
aggiornamento_klarstein_con_smartpid_cube_guida_step-by-step.pdf
here video tutorial of the operations
ENGLISH VERSION
ITALIAN VERSION
WiFi configuration and MQTT server connection
In order to connect smartPID controller (any application) to the WiFi and than to the private MQTT server few provisioning and configuration operations are needed
The logical step to follow are
- SmartPID account creation (sign-up via app)
- WiFi configuration and provisioning
- SmartPID pairing with the app using serial number
in all steps you need some credentials and paramters
- WiFi home network parameters : SSID and password
- SamrtPID account : username (mail account) and password from the sign-in process
- SmartPID serial number: 14 char unique string [visible on boot screen or in INFO menu]
the procedure is described in this step by step procedure and video tutorials for each applications
Smart Thermostat
Smart HomeBrewing
Smart BBQ ITALIANO
Smart Thermostat
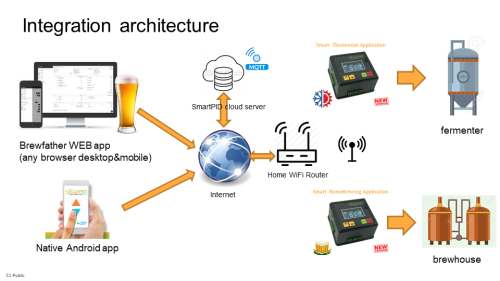
SmartPID - Brewfather integration
https://web.brewfather.app is one of the best platform for recipe design and brewing experience on both desktop and mobile devices. With a modern design that is easy to use interface allow any hobrewer to design the recipe and manage the the full brewday and fermentation
The integration with smartPID allow from the web abb and any browser mobile and desktop to interact with smartPID controller to mange either the brewday or the fermentation process
This short guide provide you basic info an reference material to perform the integration
the features that Brewfather provides are:
Smart Hombrewing Application
- Recipe upload for starting the brew directly!
- Remote monitor of process parameters (set point, current temperature, PID out, pump status, timers)
- Process events listing
- Remote actions (process start/stop pause/resume, set point change, power change, pump start/auto/stop)
Smart Thermostat
- Start the fermentation profile directly from the batch based on your recipe!
- Remote monitor of process parameters (set point, current temperature, PID out, timers)
- Process events listing
- Remote actions (process start/stop pause/resume, set point change)
Firmware Pre-Requirements
In order to use the integration a specific firwmare level is needed on SmartPID Both classic DIN box controller (STC version) and the new CUBE version are fully compatible.
- Smart Homebrewing ⇒ version 1.3-010 +
- Smart Thermostat ⇒ version 0.5-014 +
Download the FW from the SmartPID wiki page on the web site and upgrade as usual
Integration Instruction Manual
download the instruction manual and follow the step by step procedure
smarpid_brewfather_integration_standard.pdf
further informations directly on the Brewfather web site
https://docs.brewfather.app/integrations/smartpid
and in this video tutorial
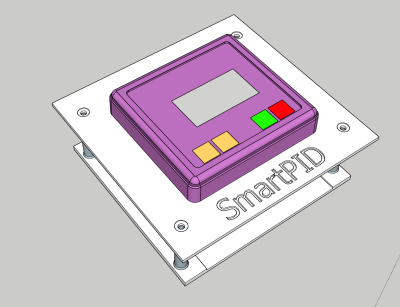
3D Printed brakets for SmartPID cube panel mount
SmarPID cube has a nice and versatile form factor that can be mounted in several different options
- Desktop
- Panel mount with optional Stainless Steal brackets (to add to the checkout)
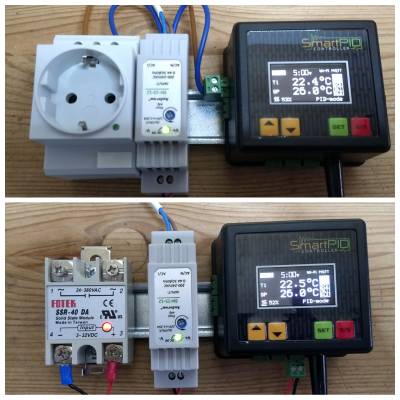
- DIN rail with bottom support
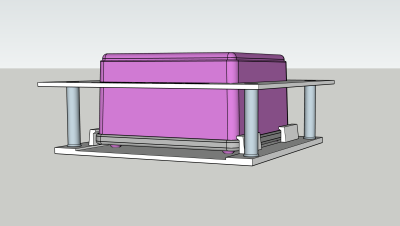
beside this option you can also 3D print a simple and effective plastic brackets that keep steady and stable the “cube” and you can fix on the front panel with 4 screws. With this option even if the cut-out in your box is not perfectly precise you have a clean and fully functional solution
here the STL files for the 3D printing ! staffe.zip
Enjoy


